Are you looking to maximize customer loyalty with your email marketing efforts? Post-purchase flows are a great way to do just that. But with so many products in your store, how do you know which ones to focus on? That's where Segments comes in. This week we're going to show you how to optimize your post-purchase flow based on gateway products. Follow our step-by-step guide to create a segment, review popular top subsequent purchases, sync it with your email provider, and set up your flow. Let's get started!
Step 1 - Find products
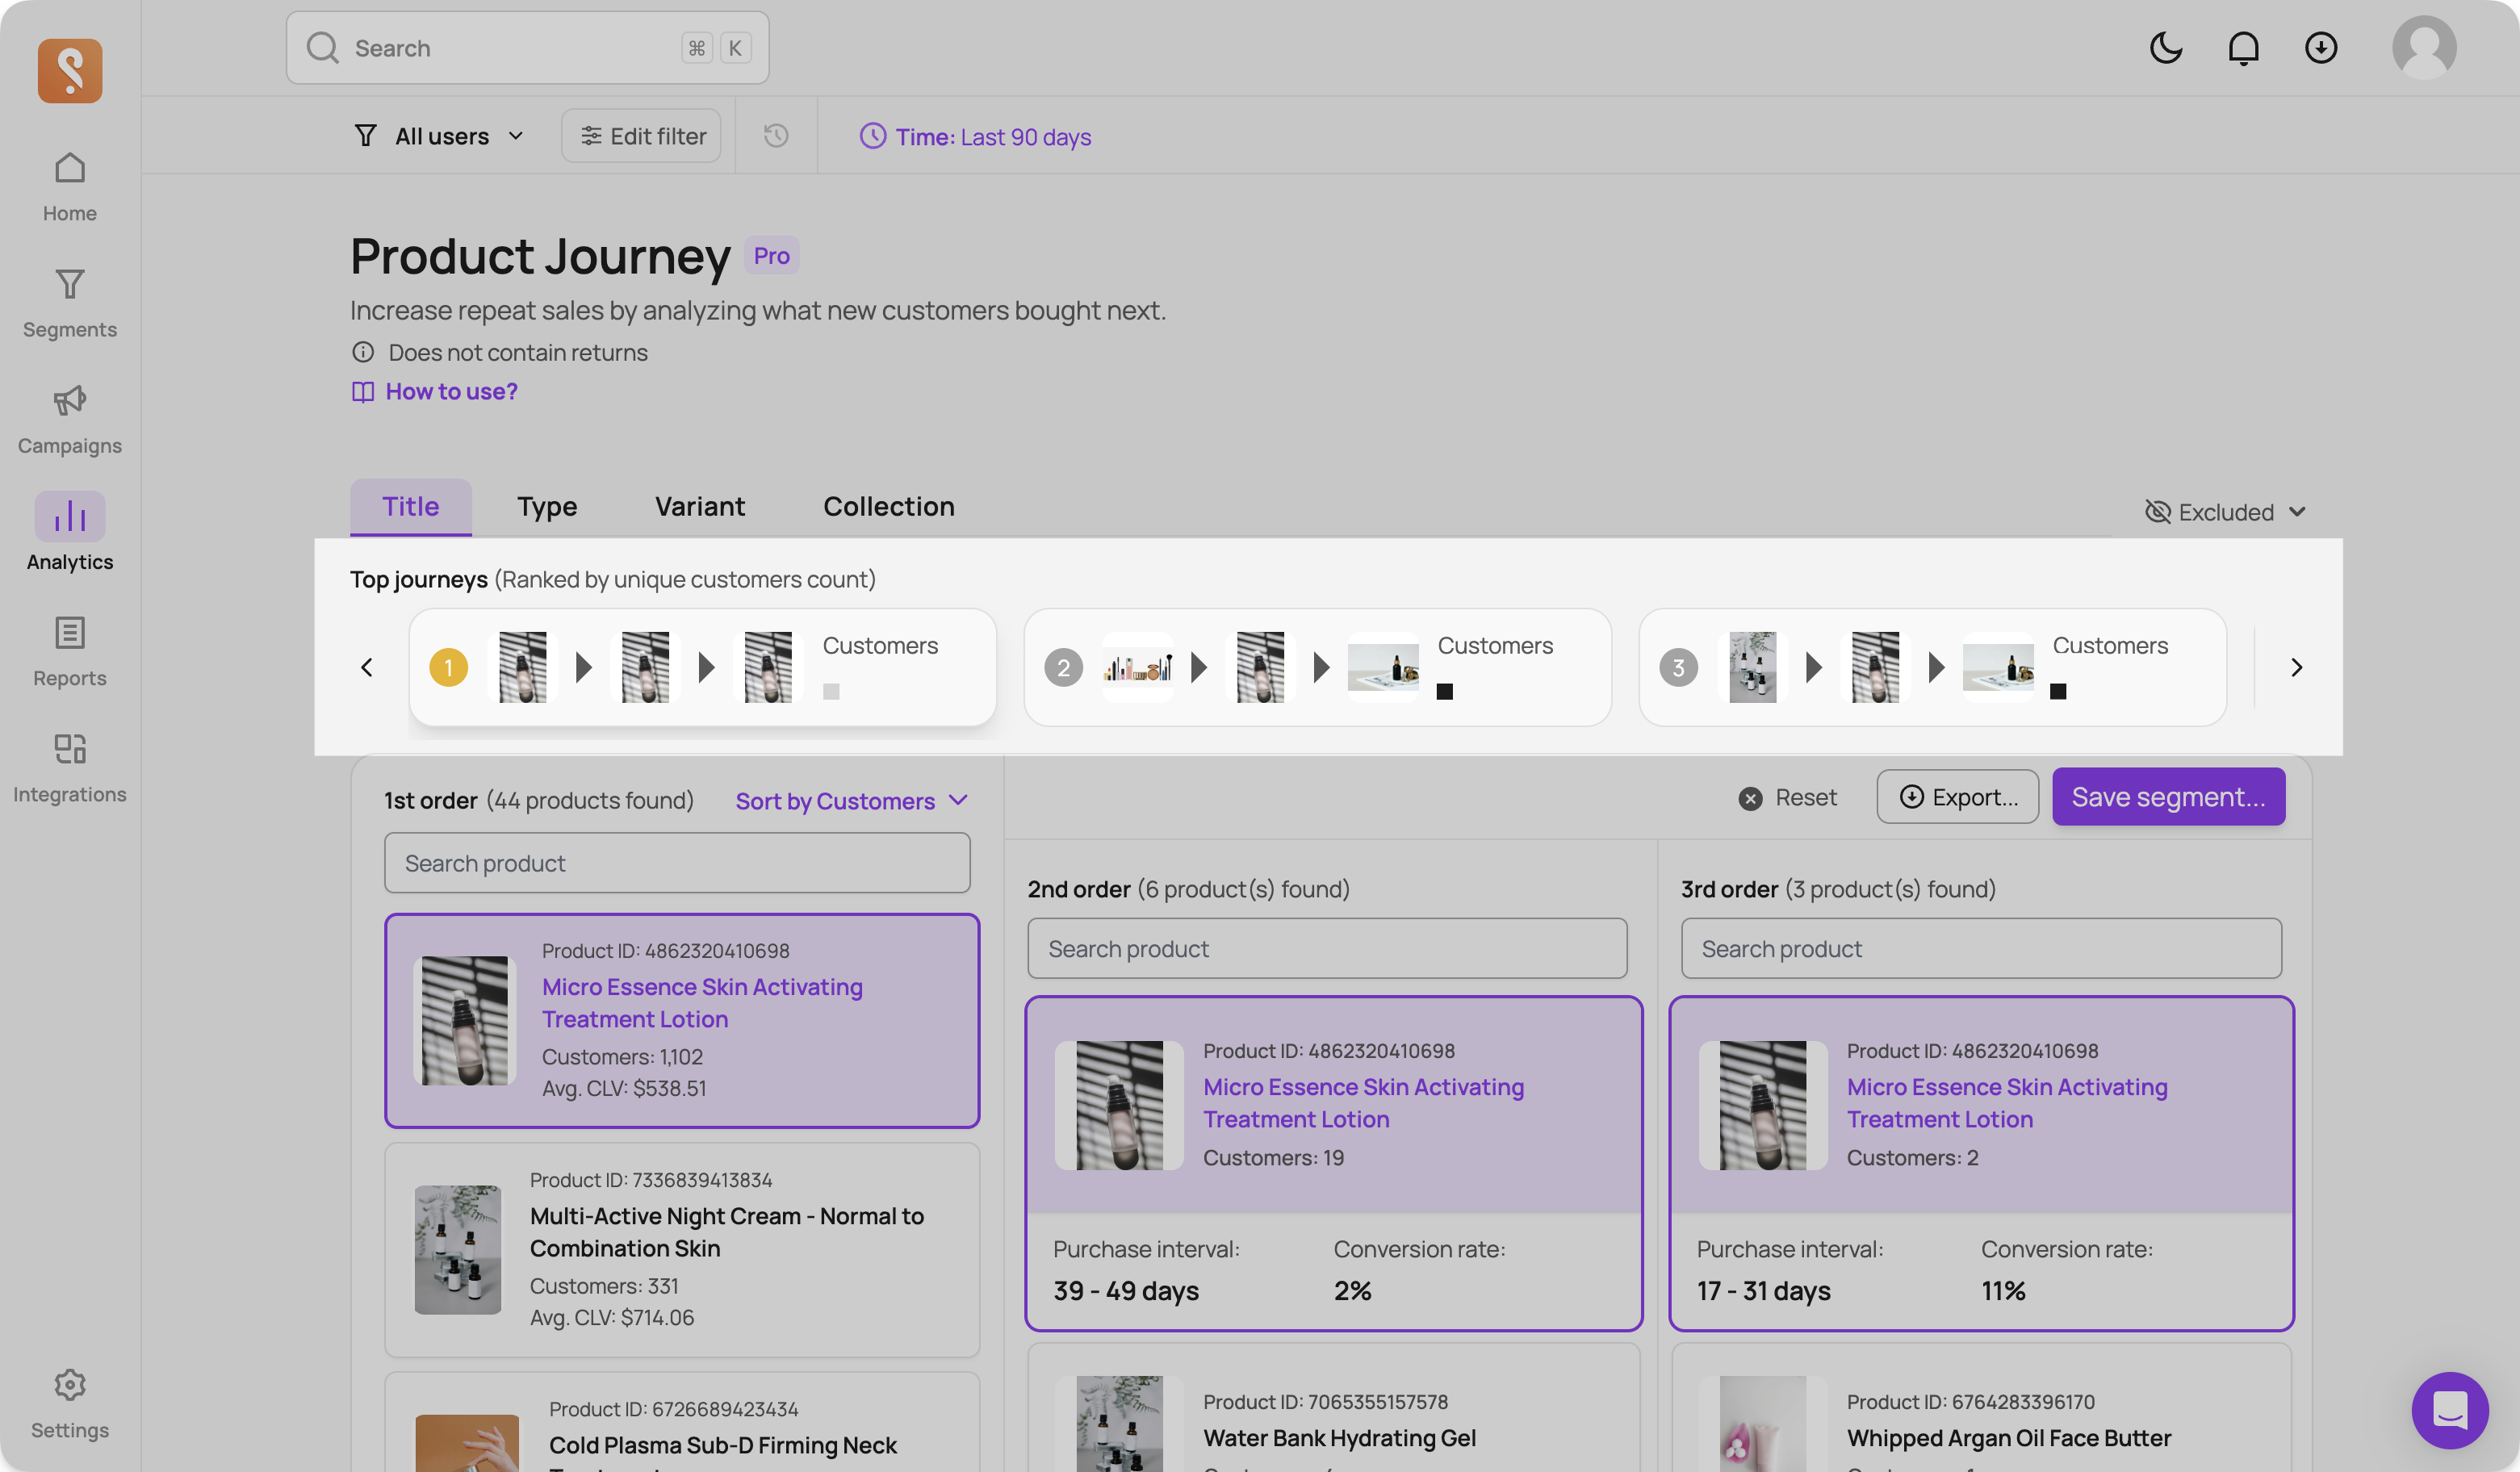
Discover your most popular gateway products and review the top subsequent purchases with the Product Journey feature. Easily explore the top purchase paths in the 'Top Journeys (Ranked by Unique Customers Count)' section. Click on the cards to explore each product's purchase interval and conversion rate. You can also explore different journeys using the interactive grid.
Step 2 - Create a segment
After selecting the optimal subsequent purchase flow you'd like to promote, click 'Create Segment' at the top right. In this example, we chose 'Multi-Active Night Cream - Normal to Combination Skin' as the first-order product. We found that 12 customers subsequently purchased 'Micro Essence Skin Activating Treatment Lotion'. Their second orders occurred approximately 25-31 days after the first order, with a conversion rate of 4%.

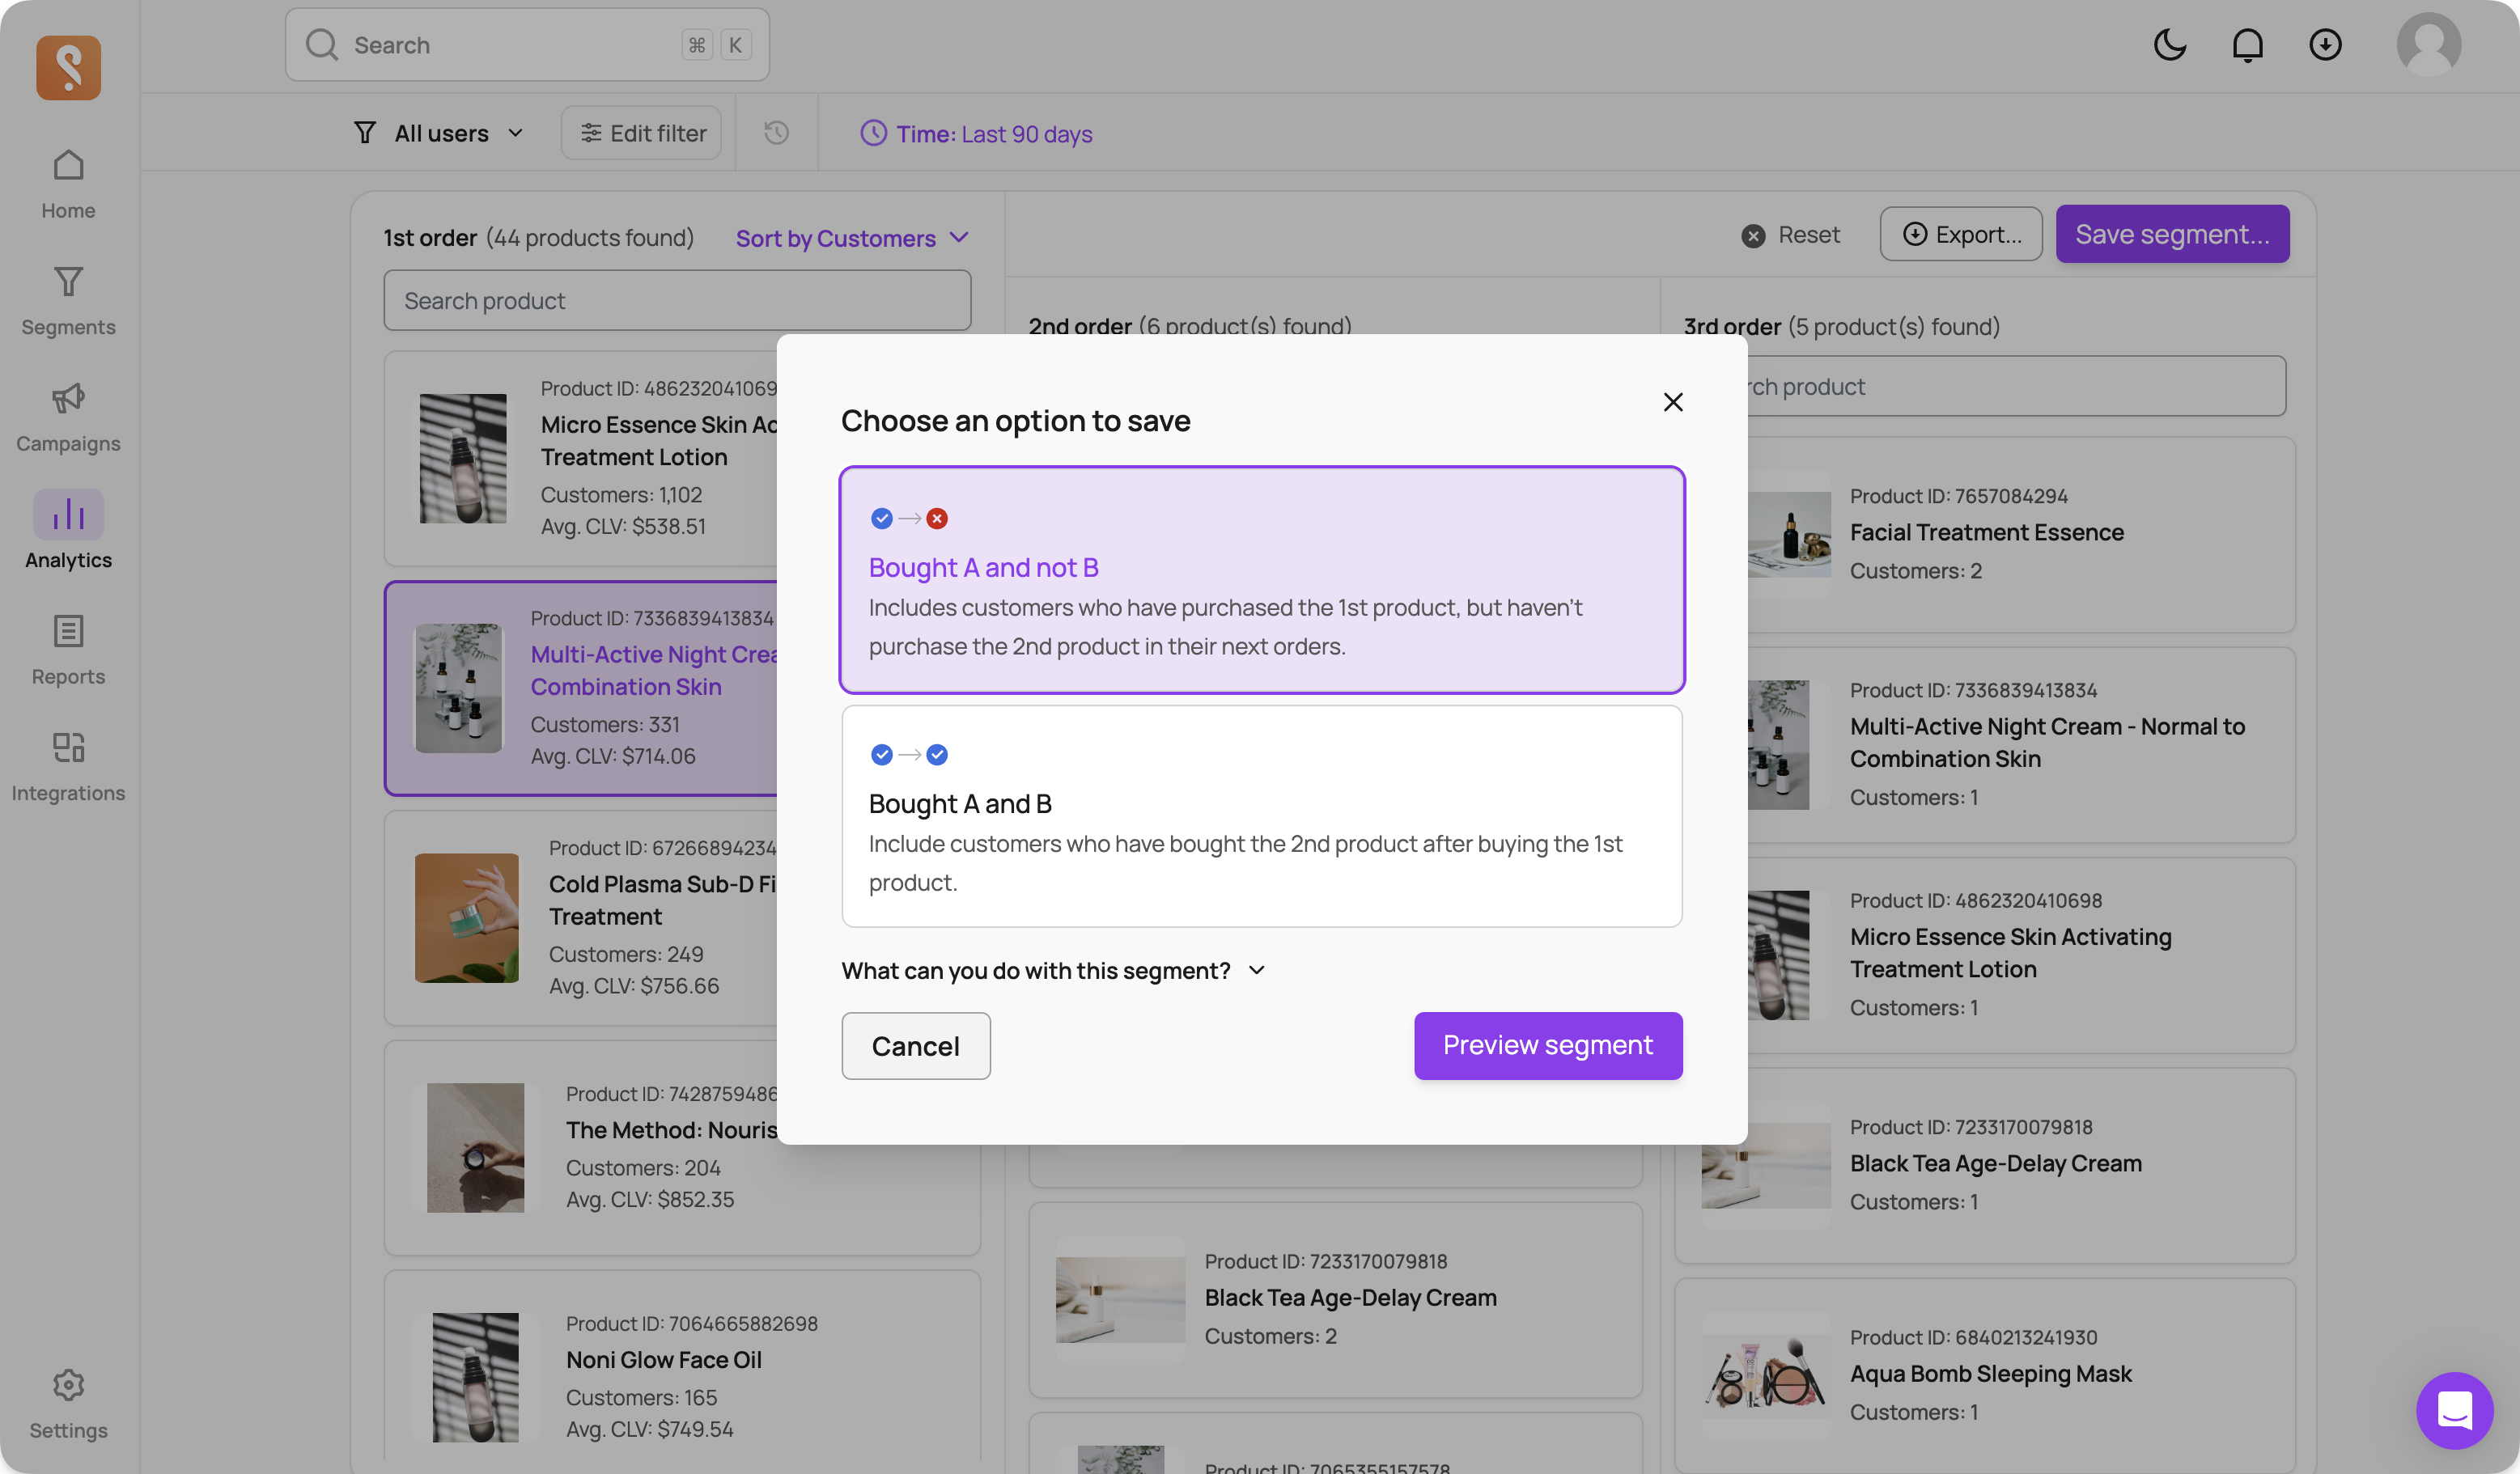
You can save this segment using two options for different marketing strategies. In this playbook, we'll select the first option, targeting those who haven't purchased the subsequent product we selected. Click “Preview segment” to proceed.
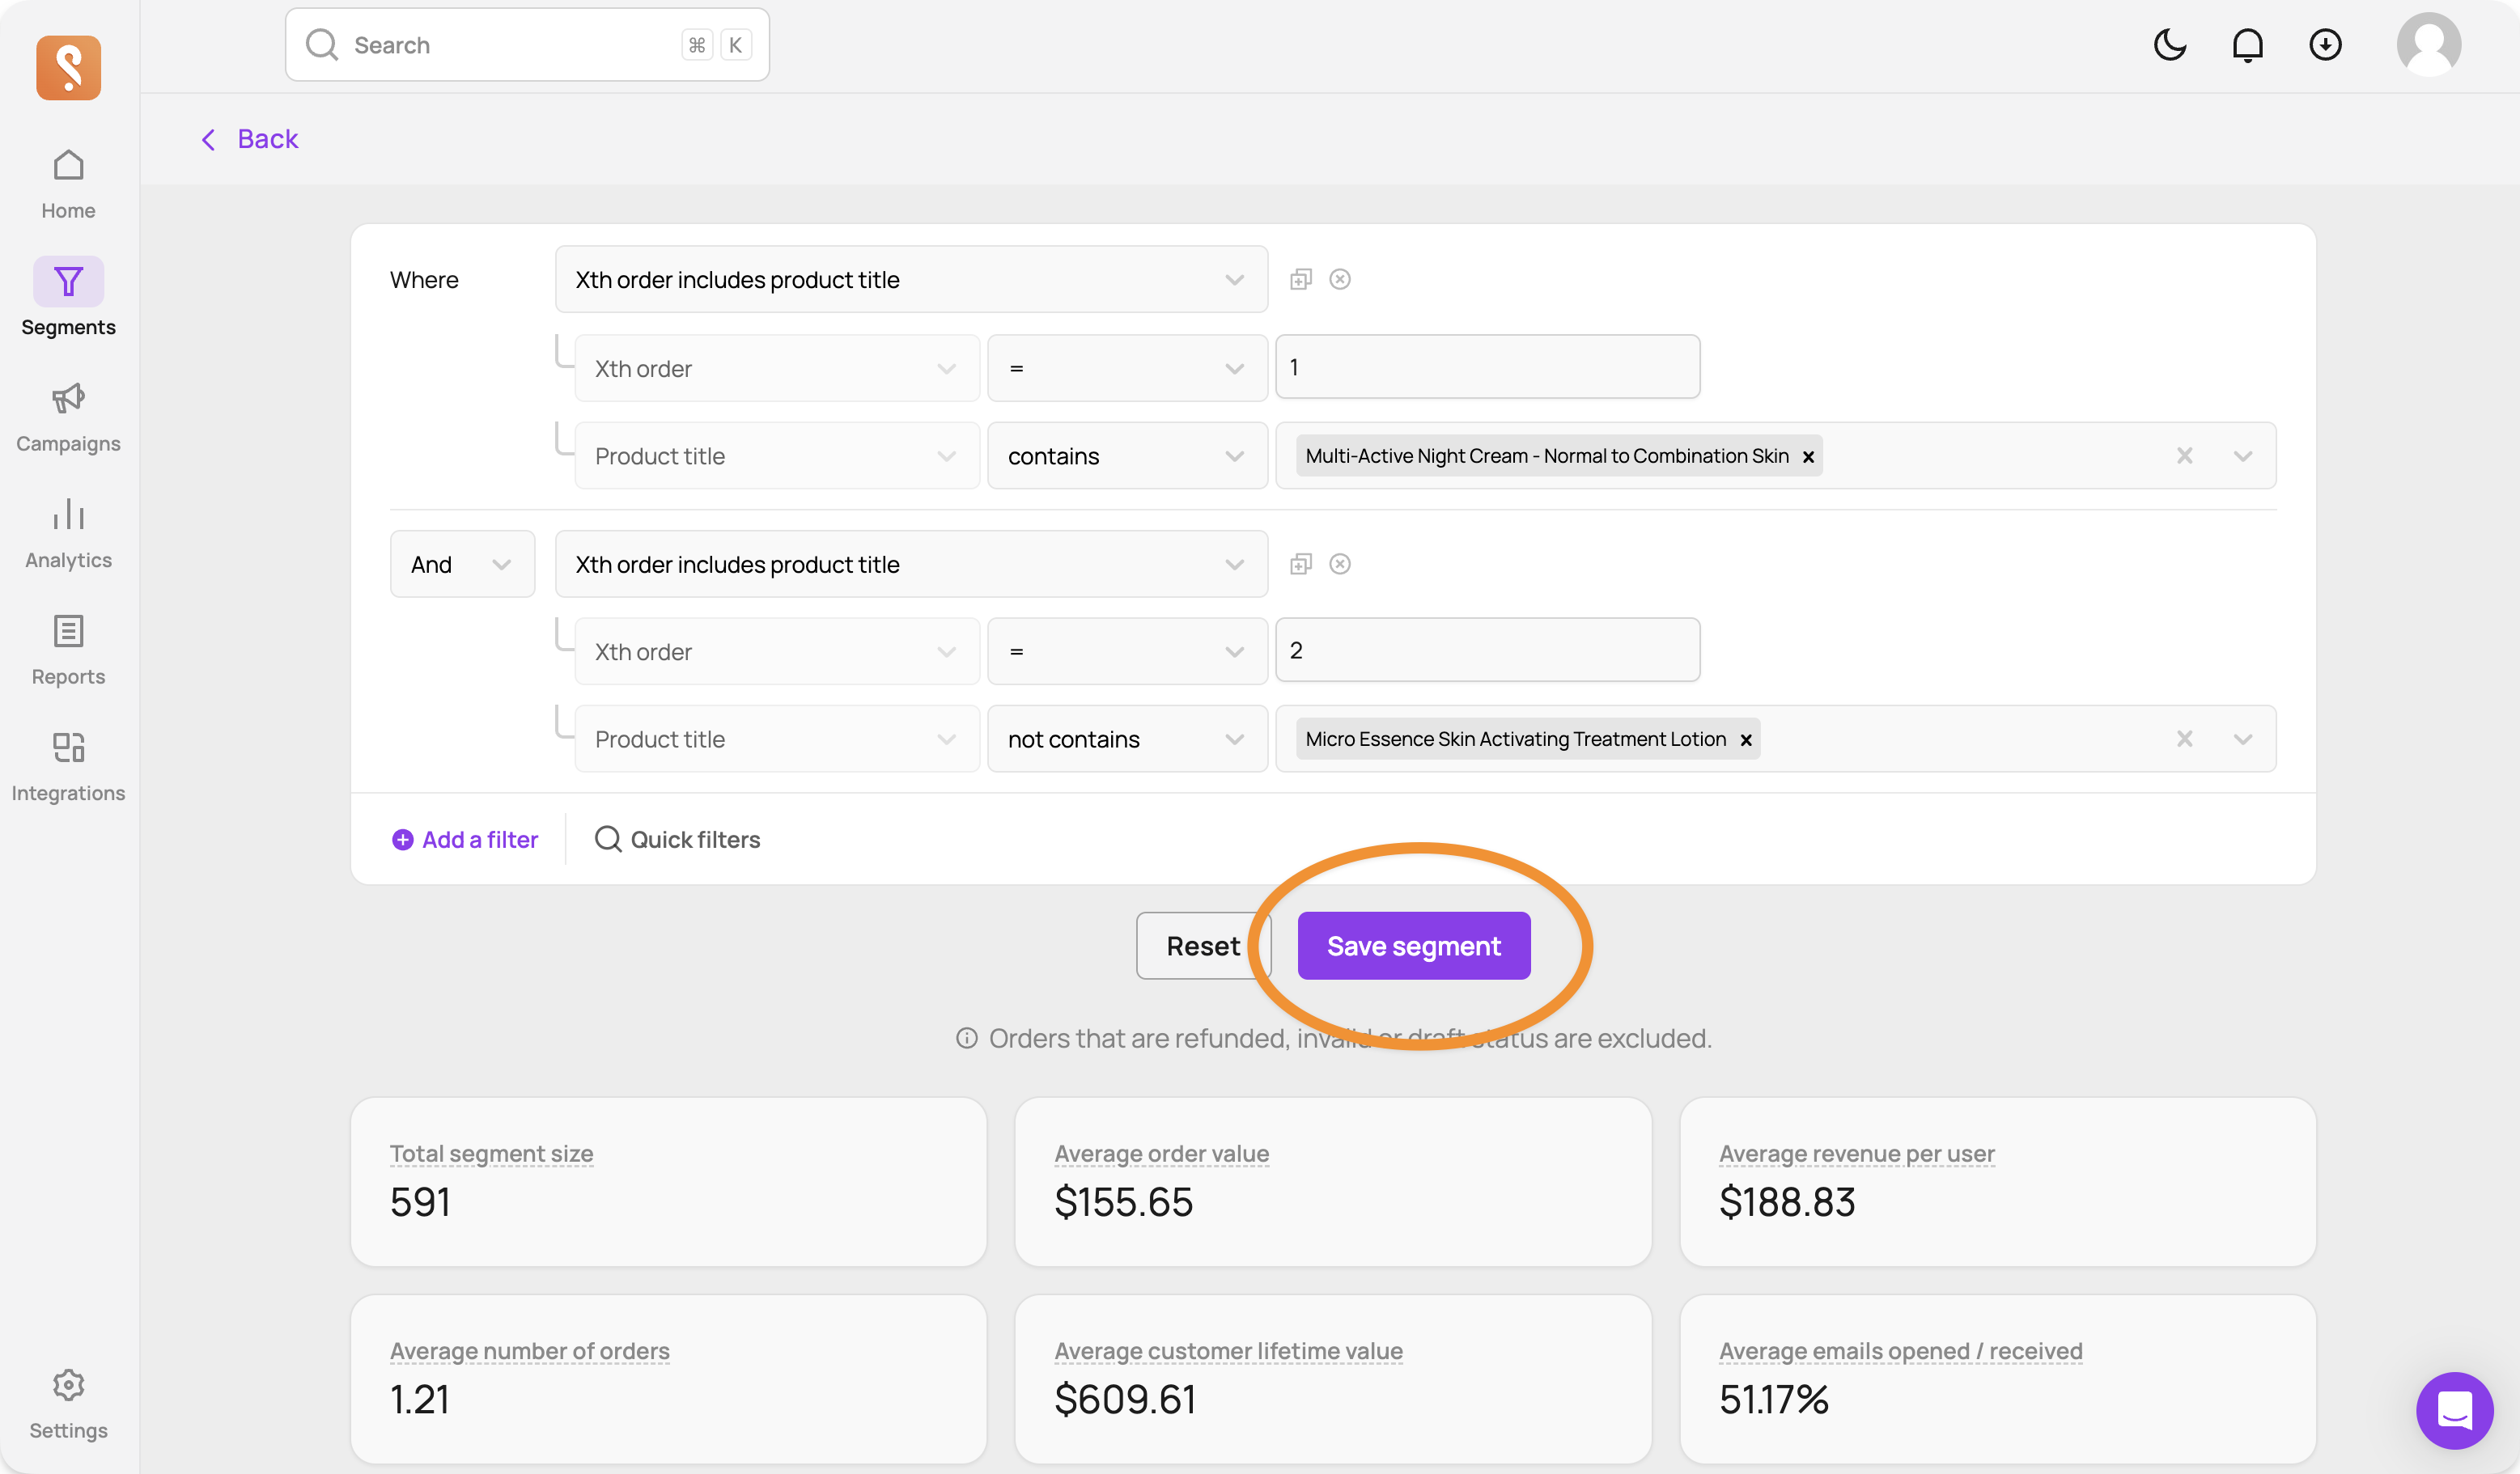
The filters to build the segment will be ready shortly. Please wait as Segments calculates the metrics for you. Then, click 'Save Segment'.
Step 3 - Sync this segment
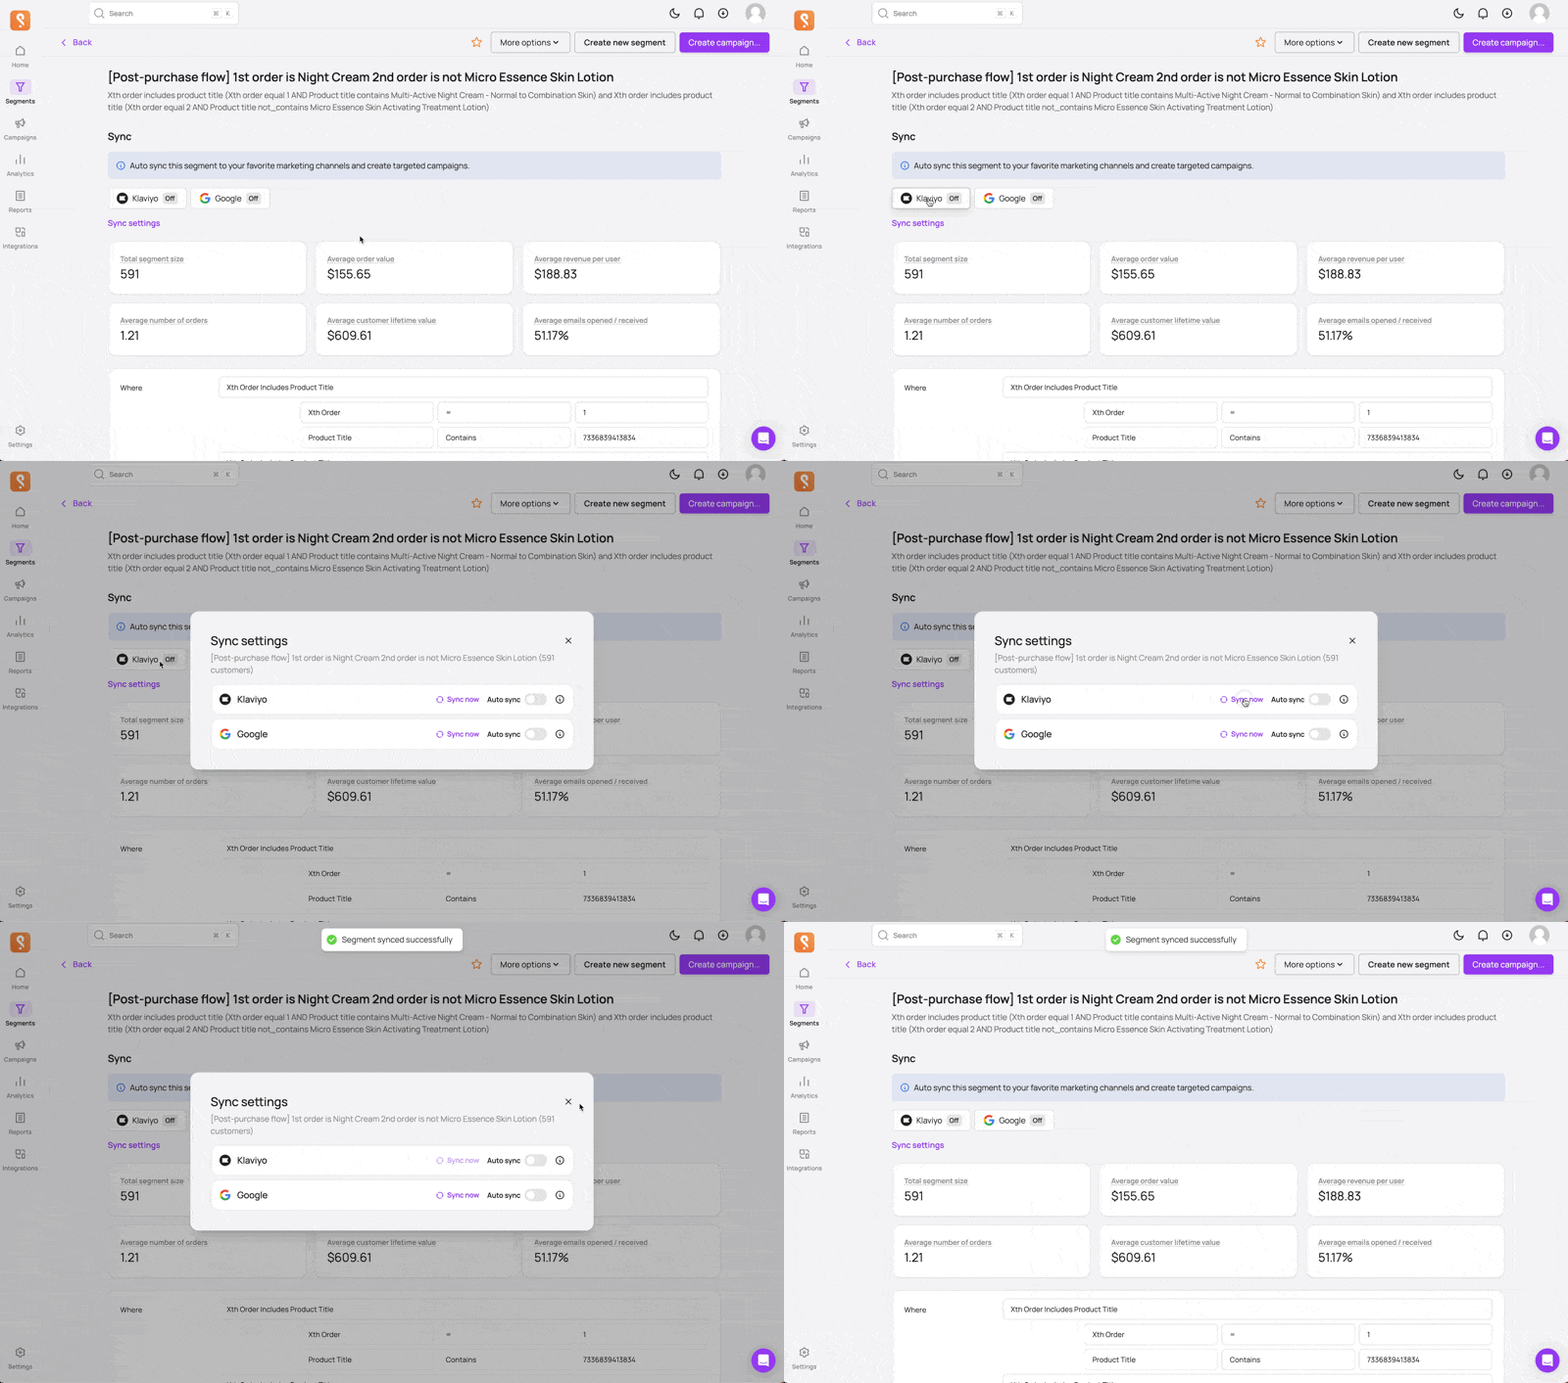
After saving the segment, you can sync it to your marketing platform for later use. Open the sync settings and click 'Sync Now' to sync your segment directly to your marketing channel.
Note: If you are using Klaviyo, your segment sync will show up as a list called [Segments] “Your segment name”. Make sure to turn on auto-sync so the list is dynamically updated daily according to your Shopify data.
Step 4 - Discover purchase timing
Go to Lifecycle journey. On the top filter bar, select the segment you just created as a filter.

Scroll down the purchase timing - 1st order to 2nd order chart. The chart displayed will show the ideal times to reach out to the segment.
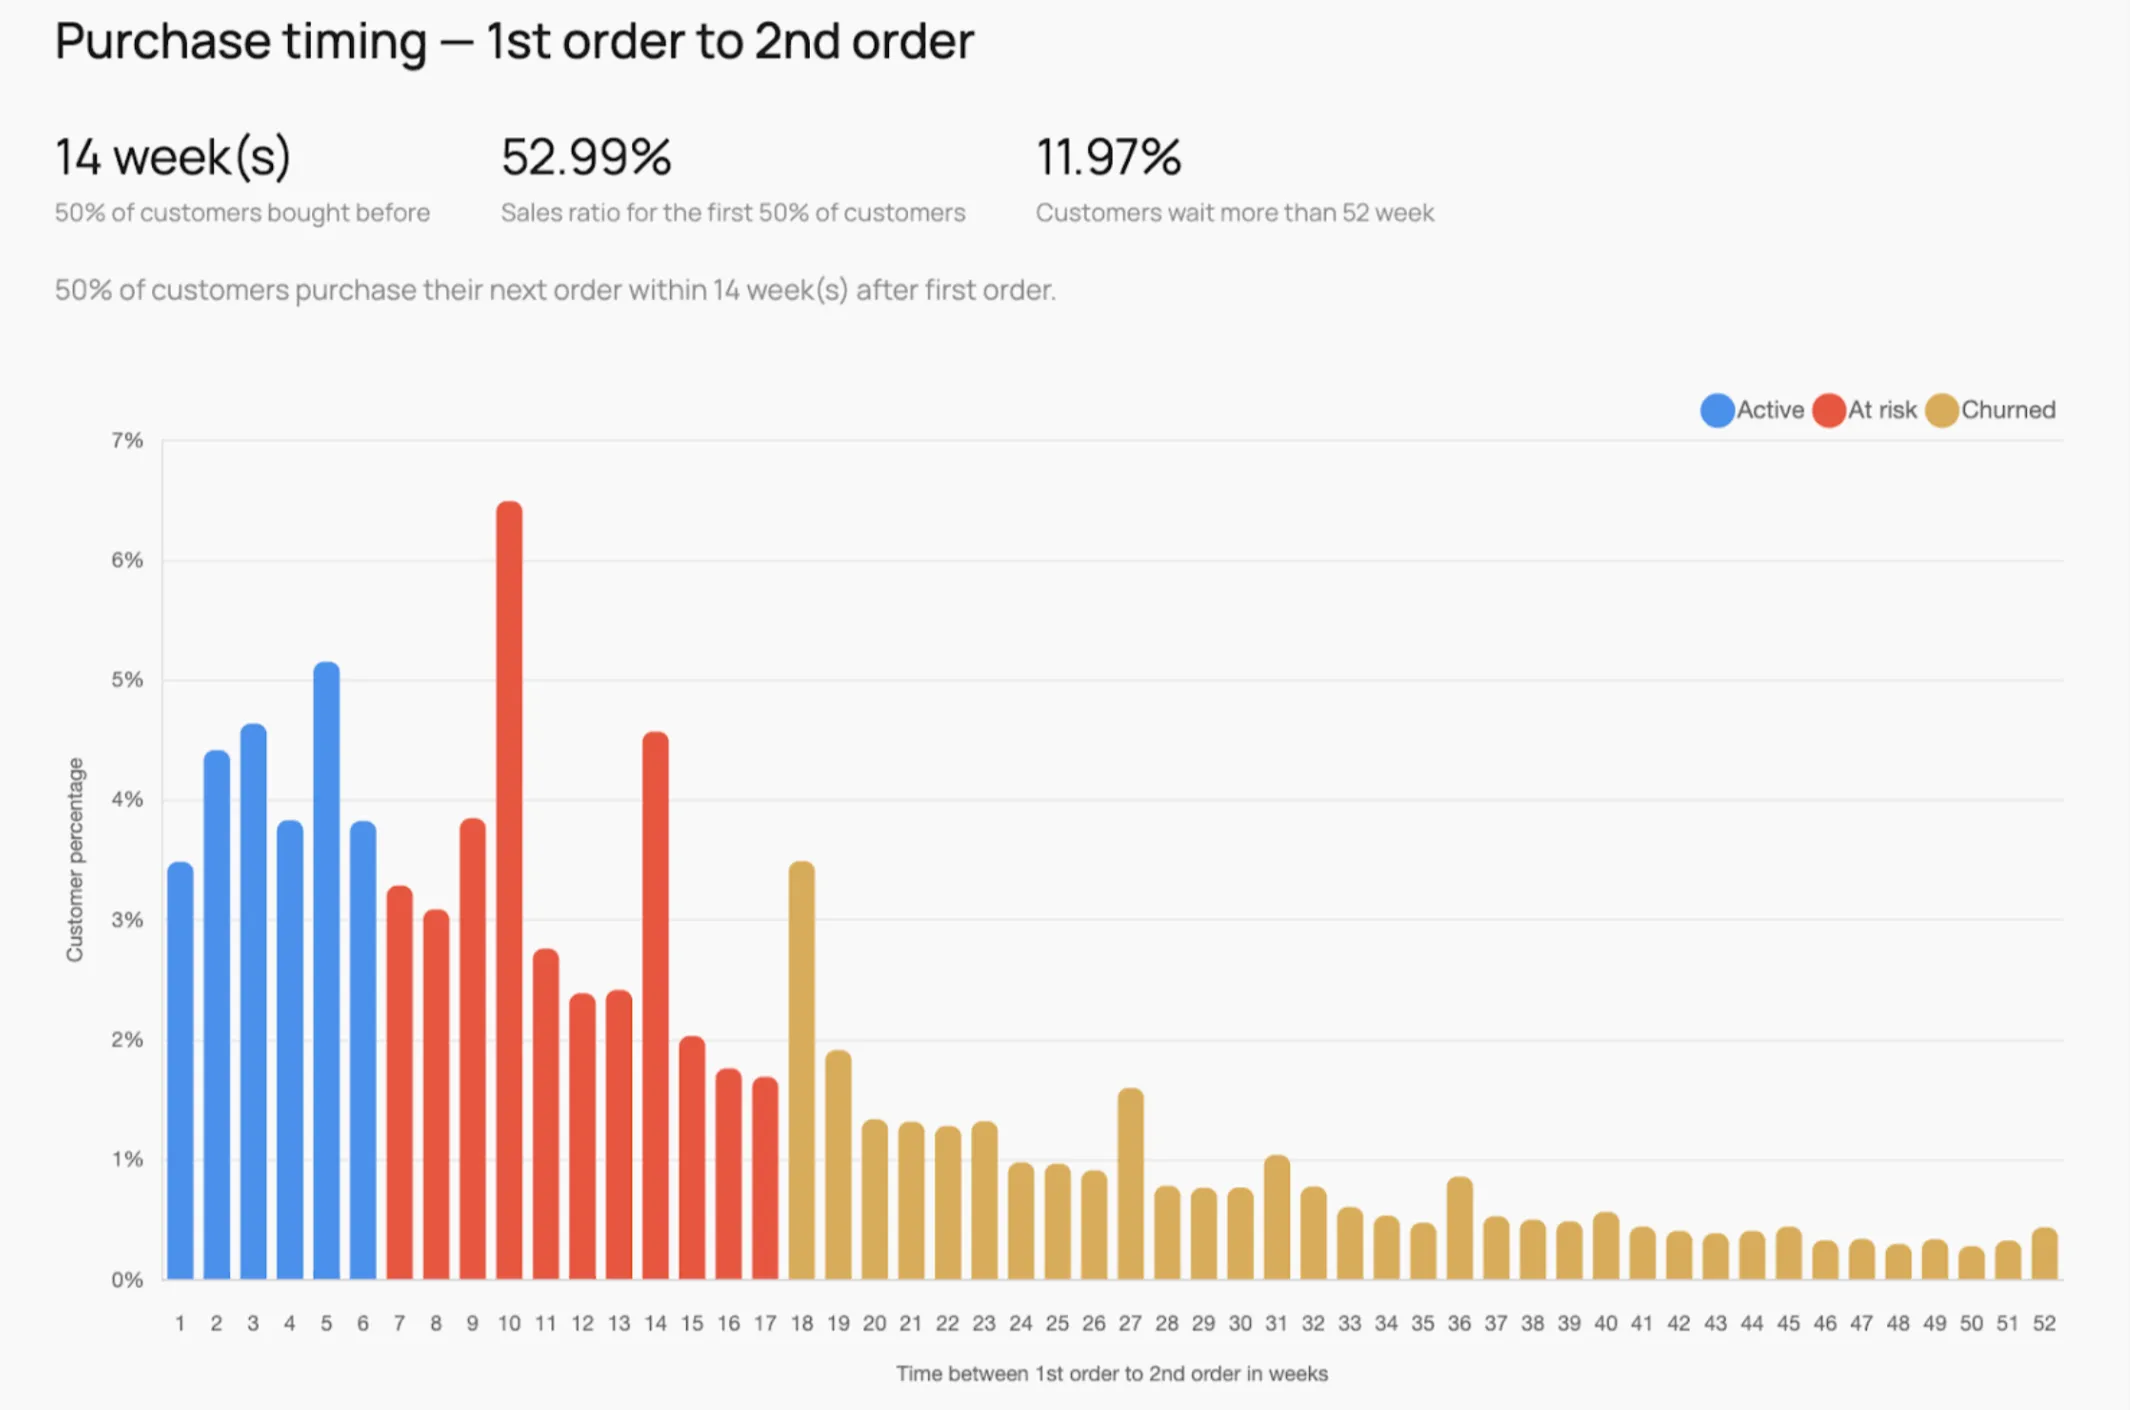
- In this example, the customers are still on the active window until week 6 (in blue), so you shouldn’t offer any discount at this point.
- From weeks 7 to 17 (in red), they are at risk, but there is a peak in the number of buyers during week 10.
- After week 18, they are already considered churned.
Step 5 - Build a new flow
Set up your flow on Klaviyo. Start with a trigger that target the segment you just synced.
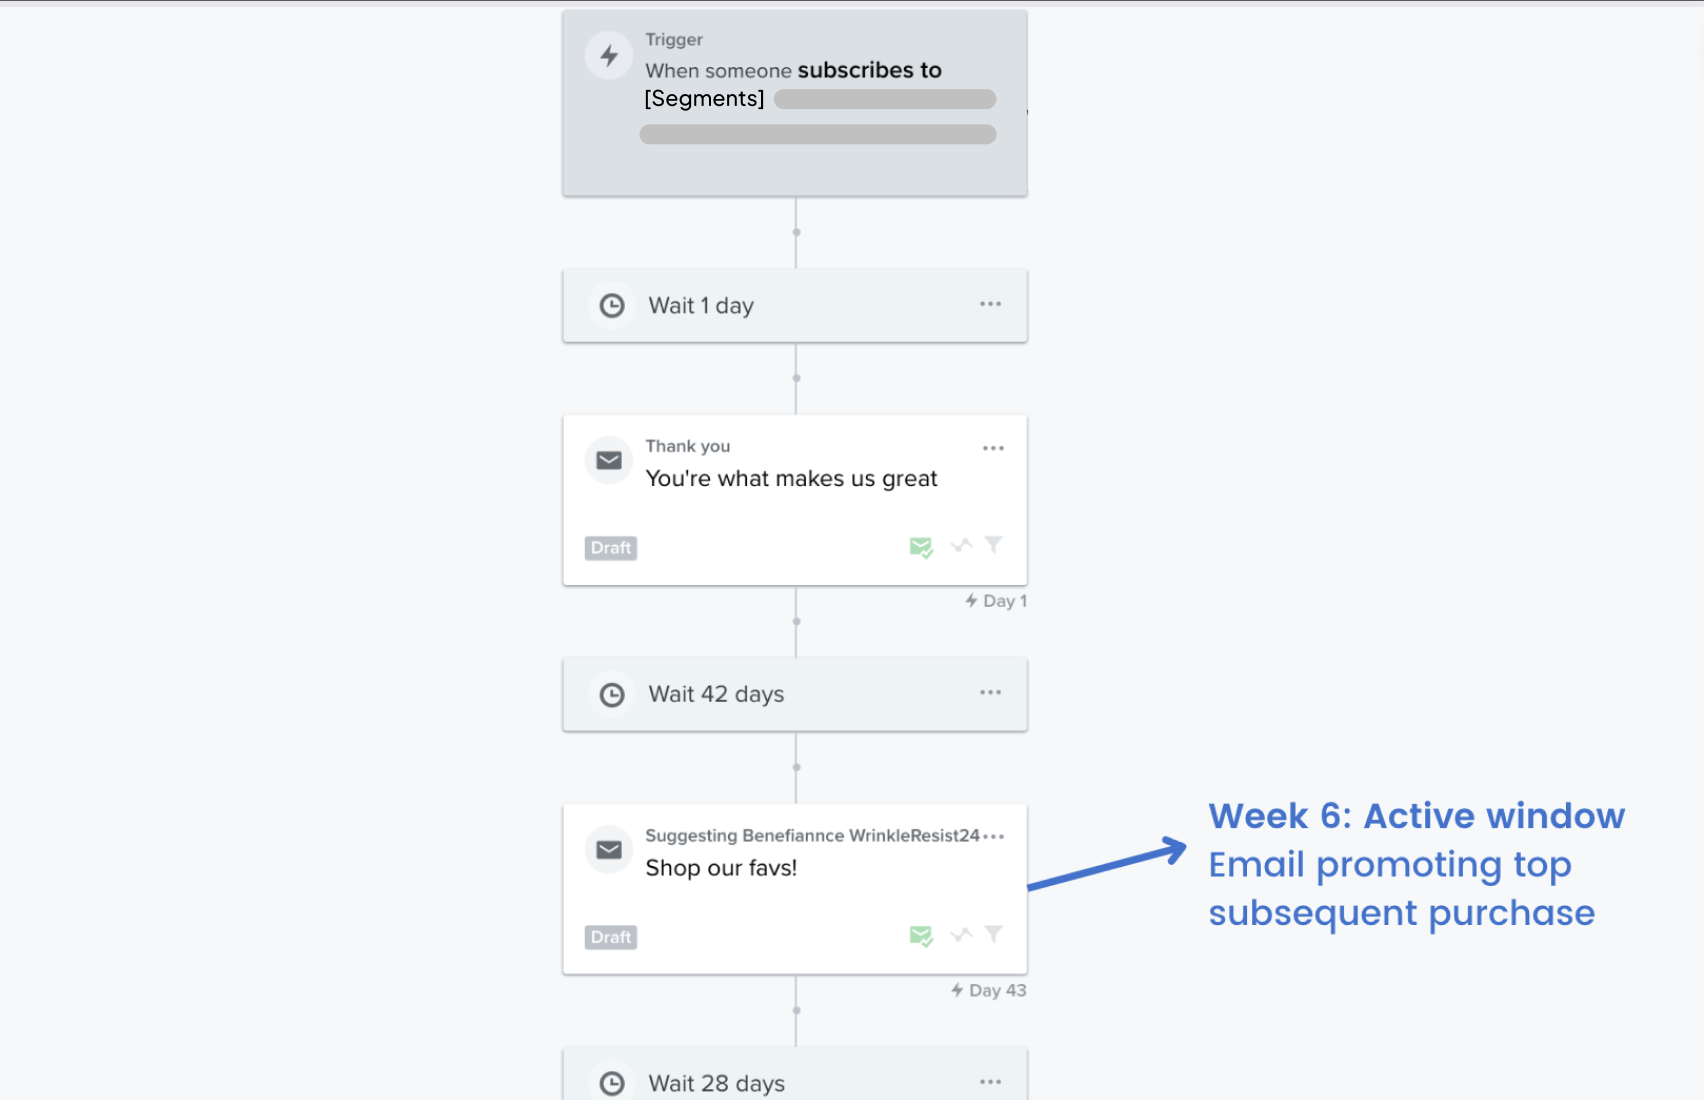
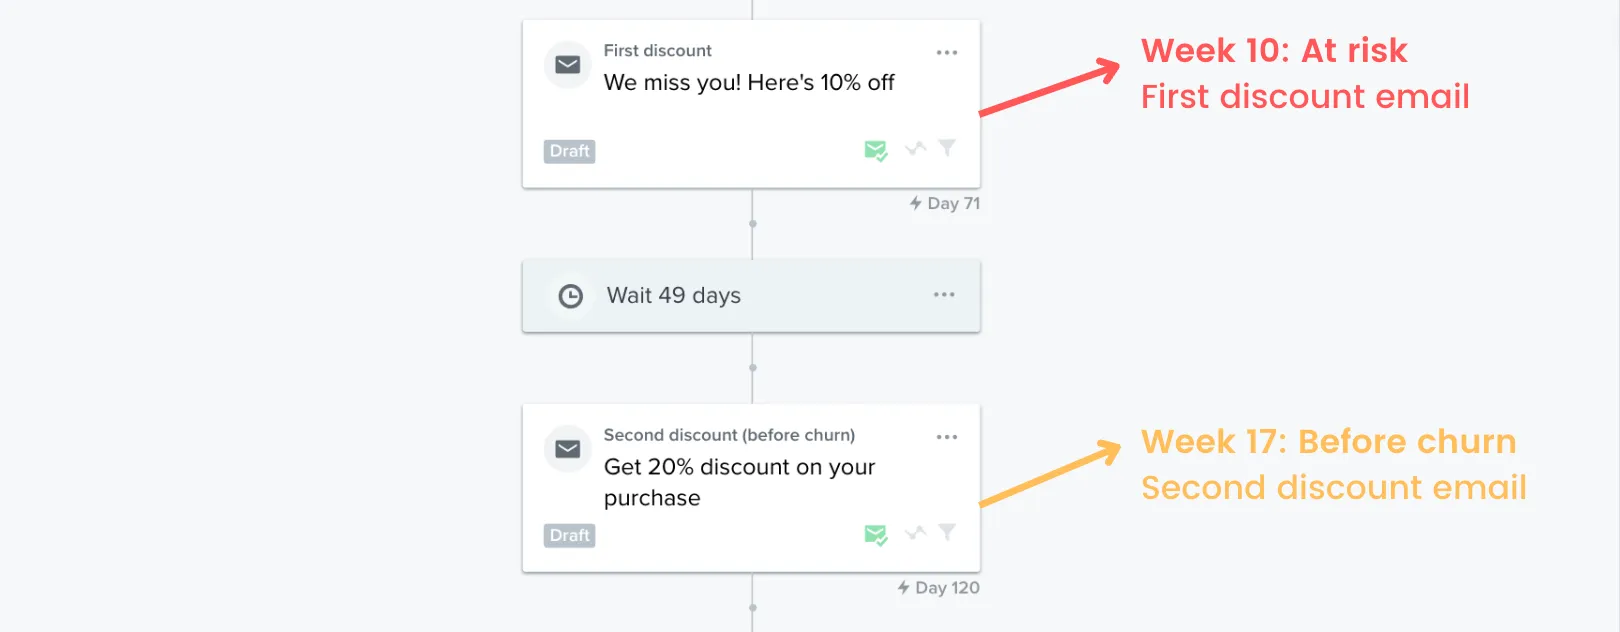
By focusing on gateway products, you can create targeted emails that resonate with your customers and encourage them to return to your store time and time again. Remember, customer loyalty is key to a successful business, and post-purchase flows are just one way to achieve it. As always, don't hesitate to reach out to our customer support team if you have any questions. Happy optimizing!


